
Connect a Namecheap Domain to Heroku the Right Way

(Step 1) Make Sure SSL Is Enabled on Heroku
Before touching DNS or Namecheap, make sure your app is ready to use HTTPS.
Go to:
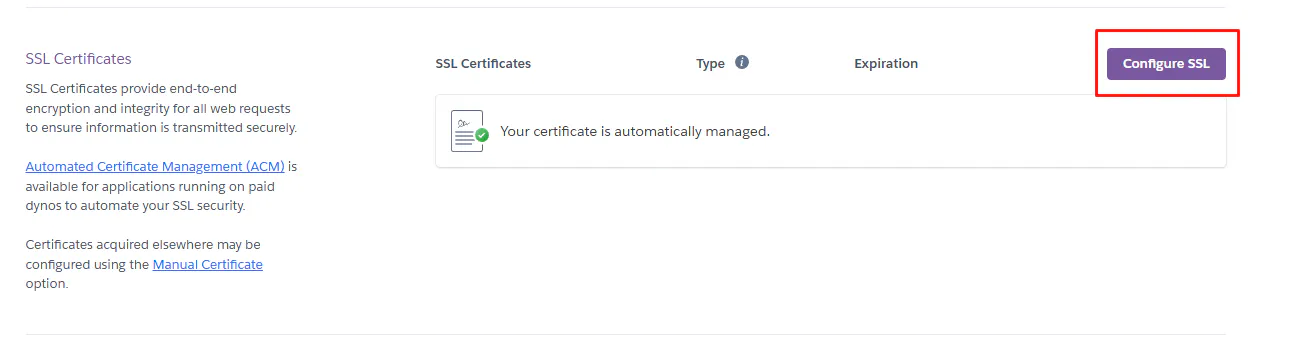
Heroku → Your App → Settings → SSL Certificates
Here’s what to check:
- You should see a message like:
“A certificate has been issued for the domain.” - Status should be OK
- SSL should be automatically managed by Heroku (ACM)
Heroku uses Automated Certificate Management (ACM) to create and renew SSL certificates for you. This means:
- You don’t need to buy SSL
- You don’t need to configure it manually
- Heroku handles renewal automatically
If SSL is not active yet:
- Wait a few minutes
- Click “Configure SSL”
- And choose "Automatic Certificate Management (ACM)"
Do not continue until SSL is ready.
Without SSL, your site may show security warnings and break redirects later.
(Step 2) Add Both Versions of Your Domain in Heroku
The first thing I always do is add both versions of the domain:
- With www
- Without www
So in Heroku:
Go to:
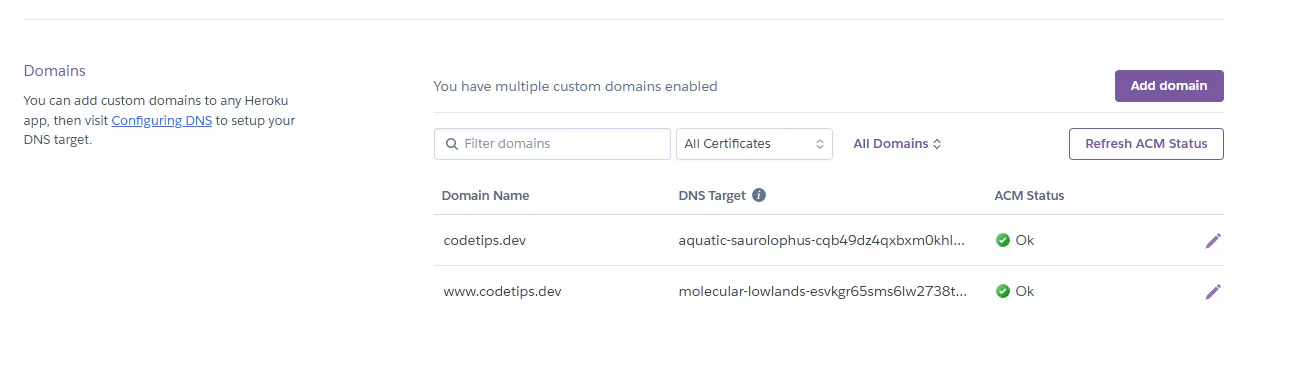
Heroku → Your App → Settings → Domains
Click Add domain and add:
yourdomain.comThen click Add domain again and add:
www.yourdomain.comAfter adding them, Heroku will show two DNS targets:
- One for yourdomain.com
- One for www.yourdomain.com
You’ll see something like:
- aquatic-xxxx.herokudns.com
- molecular-xxxx.herokudns.com
At this stage:
- The domain will NOT work yet
- SSL will still be waiting
- That’s normal
We do this first so Heroku knows which domains belong to the app before we touch DNS in Namecheap.
(Step 3) Point Your Namecheap Domain to Heroku
Now we connect Namecheap to the DNS targets that Heroku gave us.
Go to:
Namecheap → Domain List → Your Domain → Advanced DNS
You will add two records:
One for the root domain (without www) and one for www.
Root domain (without www)
This is for:
yourdomain.comAdd a record like this:
- Type: ALIAS
- Host: @
- Value: (the DNS target Heroku gave you for the non-www domain)
Example:
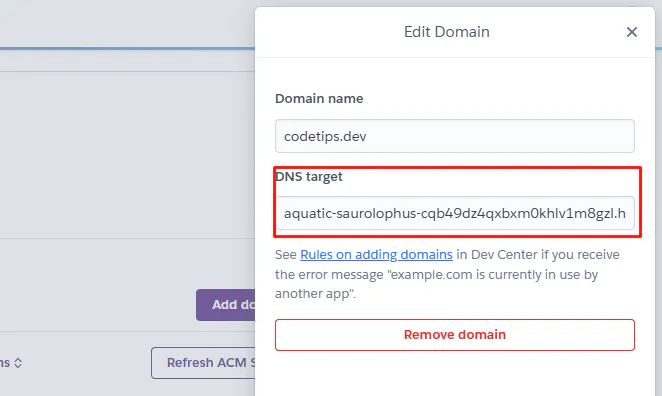
xxxx.herokudns.com- TTL: 5 min or Automatic
This tells Namecheap:
“When someone visits yourdomain.com, send them to Heroku.”
WWW version
This is for:
www.yourdomain.comAdd another record:
- Type: CNAME
- Host: www
- Value: (the DNS target Heroku gave you for the www domain)
Example:
xxxx.herokudns.com - TTL: Automatic
This tells Namecheap:
“When someone visits "yourdomain.com", send them to Heroku.”

After saving:
- Don’t delete other important records (like email or verification)
- Wait a few minutes
- Sometimes DNS can take up to a few hours to fully work
At this point, your domain is officially connected to Heroku.
(Step 4) Handle www vs non-www (Optional but Recommended)
Now your domain works, but you still have two versions:
- yourdomain.com
- www.yourdomain.com
For SEO and consistency, you should use only one.
I use the version without www.
Option A – Redirect in Next.js 16 (Best Way)
If you’re using Next.js 16, you can handle this inside your app.
In next.config.ts:
import type { NextConfig } from "next"

const nextConfig: NextConfig = {
  async redirects() {
    return [
      {
        source: "/:path*",
        has: [
          {
            type: "host",
            value: "www.yourdomain.com",
          },
        ],
        destination: "https://yourdomain.com/:path*",
        permanent: true,
      },
    ]
  },
}

export default nextConfig
What this does:
- Any visit to www.yourdomain.com
- Will automatically redirect to yourdomain.com
- Keeps SEO clean
- Avoids duplicate content
After adding it:
- Commit
- Push
- Let Heroku redeploy
- Test: www.yourdomain.com should jump to yourdomain.com
Option B – Redirect from Namecheap
Namecheap also has a “Domain Redirect” feature, but:
- It’s not ideal when using Heroku
- It can break DNS if misused
- It doesn’t handle paths as cleanly
Example problem:
- www.site.com/post/1 might not redirect properly
So:
- If you use Next.js → do it in code
- If you don’t control the app → Namecheap redirect can work, but be careful
Summary
- Redirecting is optional, but recommended
- Pick one main domain
- Use Next.js redirect if you can
- Keep DNS simple and clean
Get CodeTips in your inbox
Free subscription for coding tutorials, best practices, and updates.